

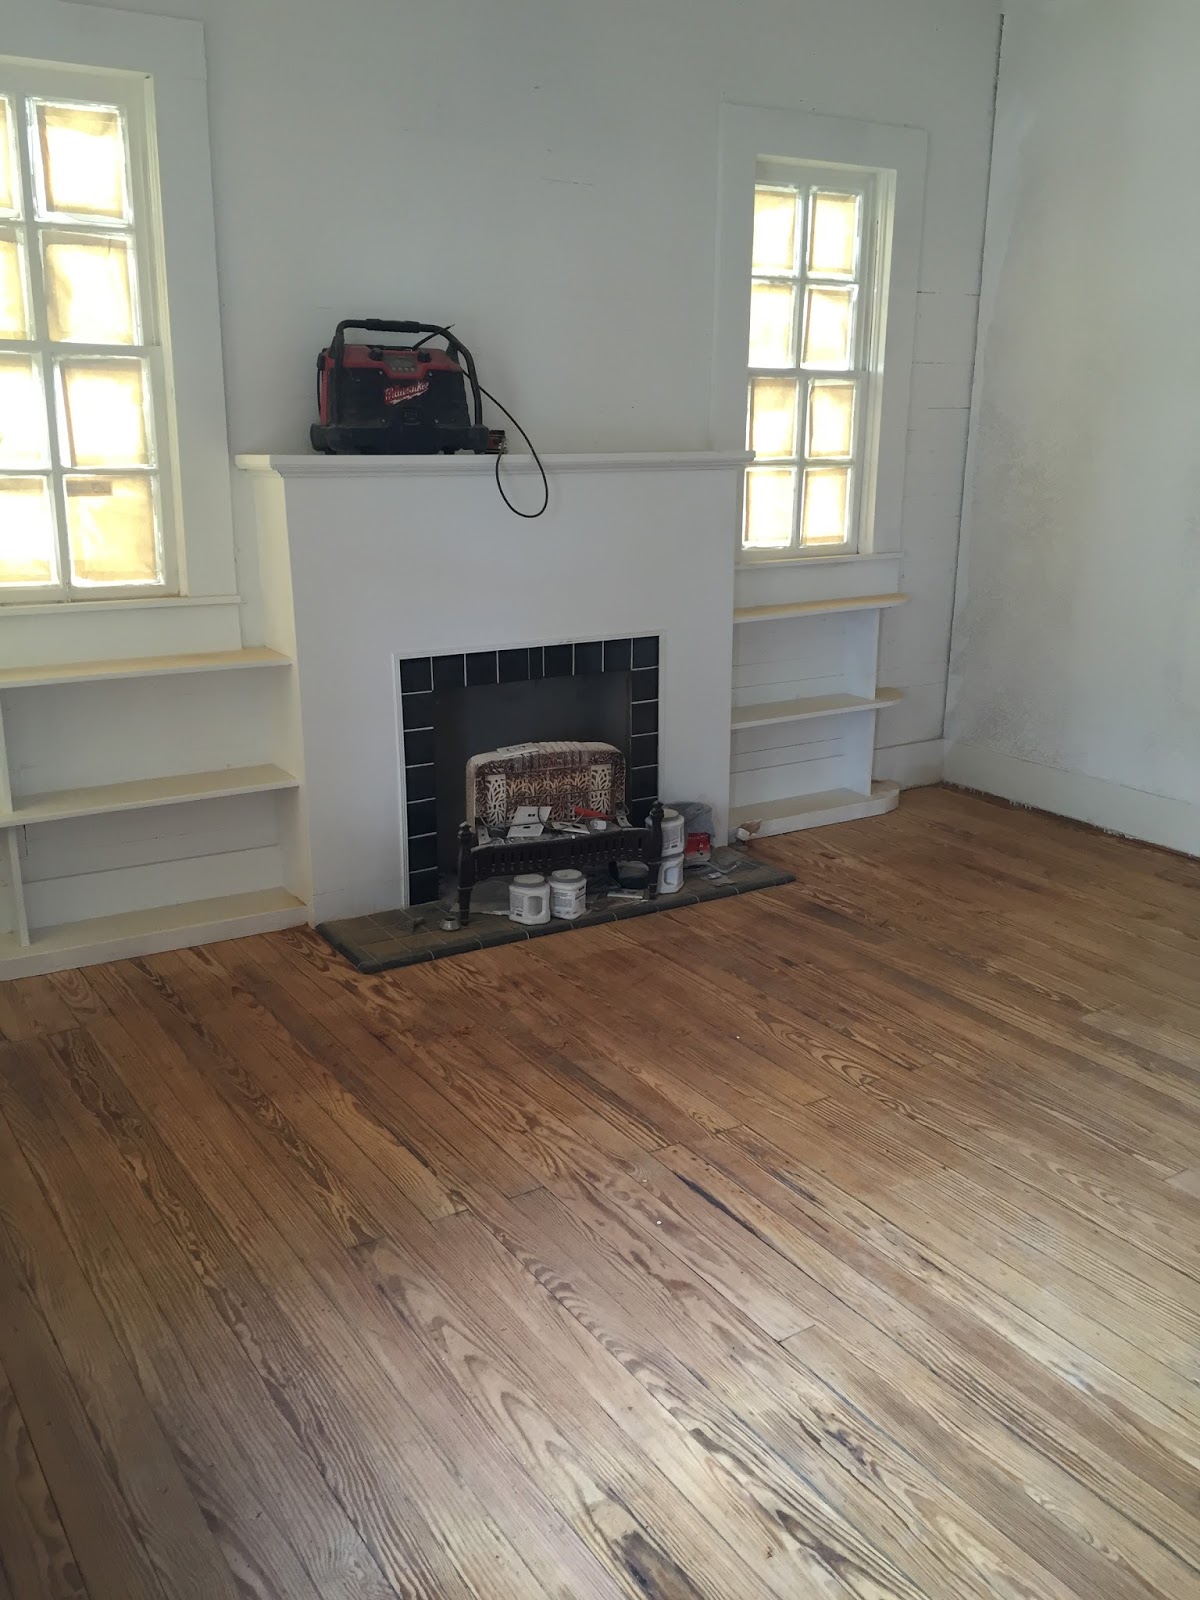
Casey sent me this ^^ during school one day and I couldn't concentrate on anything else for the rest of the day. I wanted to race home and see them in person. They looked better than I ever thought they could. The wood grain was beautiful and the dark stained areas that remained only added so much character and history. Casey tells me that whoever built these floors didn't put them down very well because they aren't spaced properly and there's obvious lines running through the floor. I don't even care. I was just so happy that it worked, I didn't care about anything else.
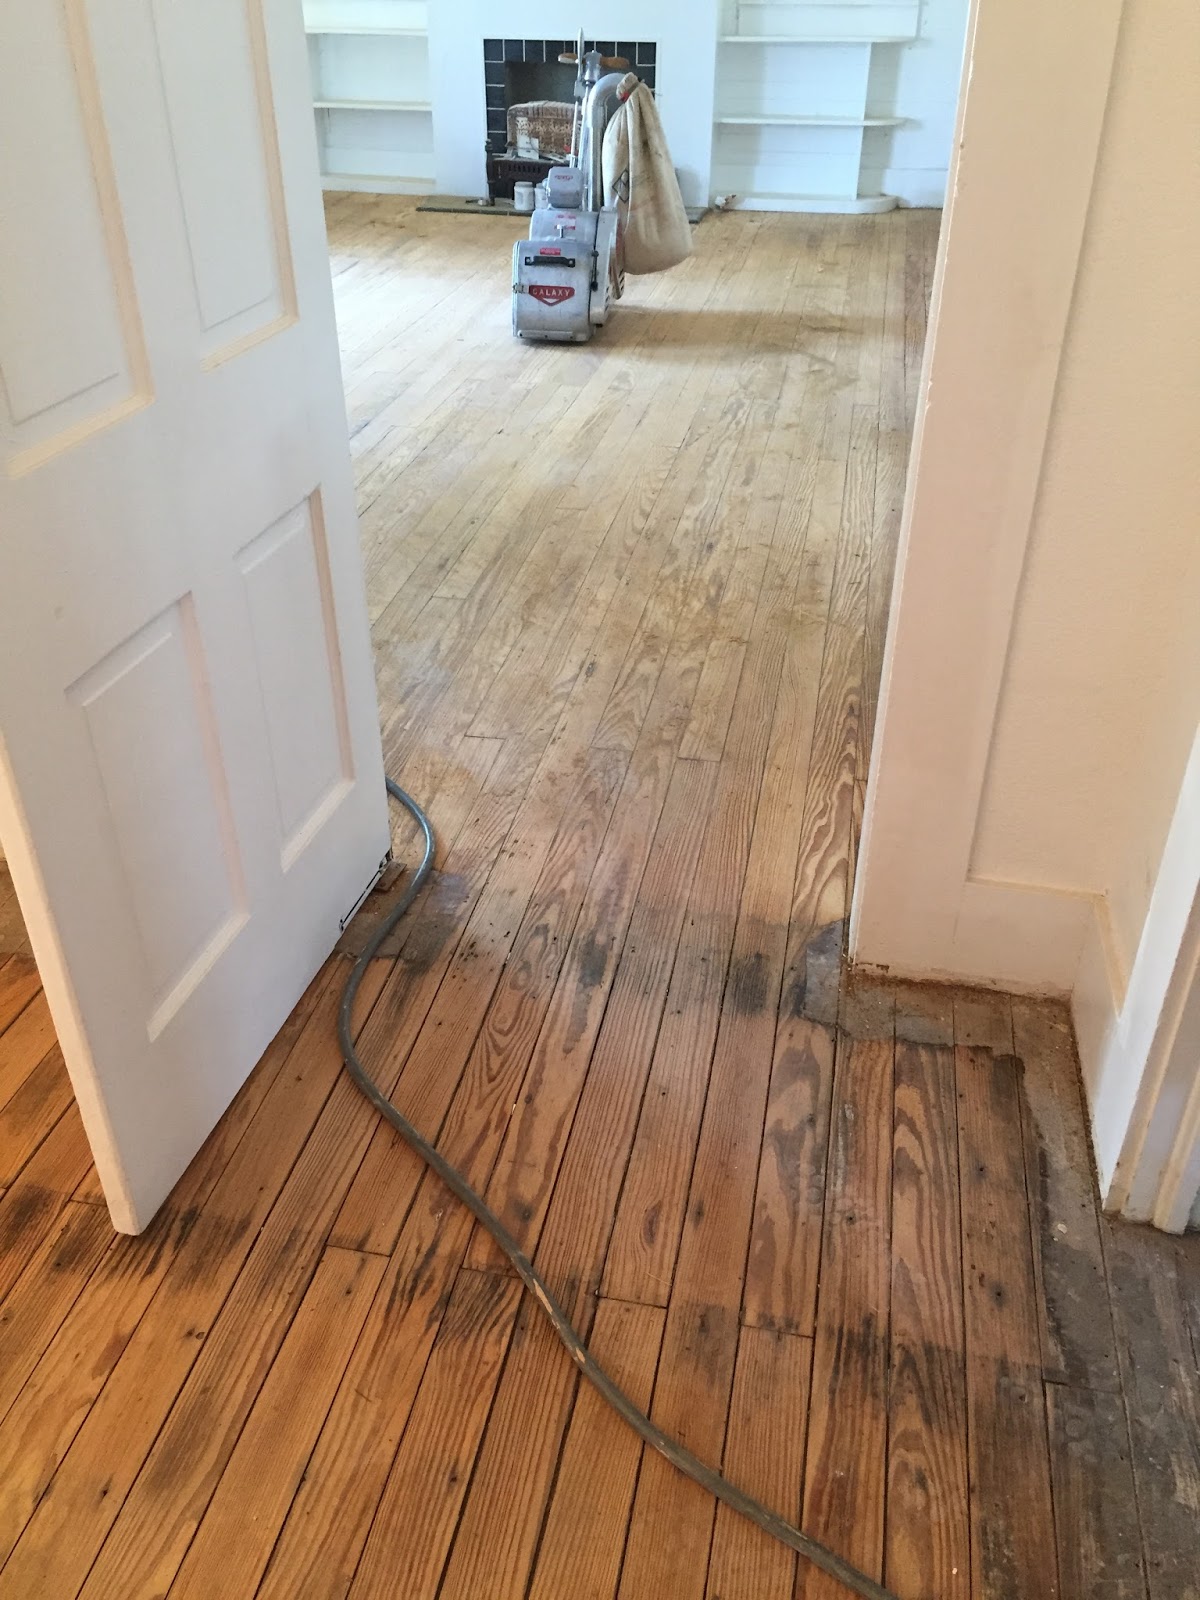
I got home just at the end of the sanding job so I caught a little glimpse of how it worked. I imagine that this job would be a really rewarding type of work. To see something look so ugly and beaten down, and revive it to its natural state within seconds, must've been fun. Sparks were flying every time he hit a nail in the floor, which was a bit unnerving to me, although unphased by him.
The kitchen floor was my favorite. Over time, something had left huge black horizontal lines in the wood and so when he sanded them, they didn't sand out. And there's also some type of water leak that's left a stain. To me, that's the beautiful parts of the house, that show a little lived-in history.


Tile on the bathroom floor was a hot topic for Casey and I. Of course I had these grand ideas of what it could look like and what style it should represent. Then I looked at the price tag. We quickly dwindled down all of our first options to finding something a little more affordable.
Casey wanted a clean, modern tile, and we found a lovely high-gloss faux marble tile that really was an expensive looking tile for a low cost. He was also drawn to the stone looking tiles too, more of his Texas western upbringing coming into effect.
I on the other hand, fell on the complete opposite of Casey's taste. I'm used to a more traditional, vintage style. I grew up in a house in London that was over one hundred years old, so I am pretty familiar with old. I think my parents did such a great job keeping the integrity of the house by decorating it in a way that would have been done in its prime. I really didn't want to make this house too modern looking. Every time we walked through either one of the home improvement stores (which was daily, right up until the wedding) I would stand and stare at these hexagon tiles. Something about the geometric shapes and the black and white pattern. I just loved it and I knew it would be a timeless look for an older house. Casey was 100% against them. He would just look at them and say "no".
So we compromised, as every engaged couple does, and we went with the large square marble.
Here is the hardie board down over the wood for the beginning stages of tiling.
Staining the wood floors and tiling the bathroom happened on the same day, and then we were kicked out of the house for two days so the stain could dry. (TORTURE)


During the sanding process, the outside of the house was pressure washed and prepped for its first coat of paint. Definitely the most nervous I'd been about any stage of this renovation. Most of the old paint remained, which was annoying, but sanding down every piece of siding just wasn't in our time frame.


Stained floors and tile next!
Comments