
Door Removal/ Tub Addition


Putting our bath tub in was really exciting to me. It was the first new thing to go in the house and since we kept a lot of the original fixtures, it was fun to have something brand new. 
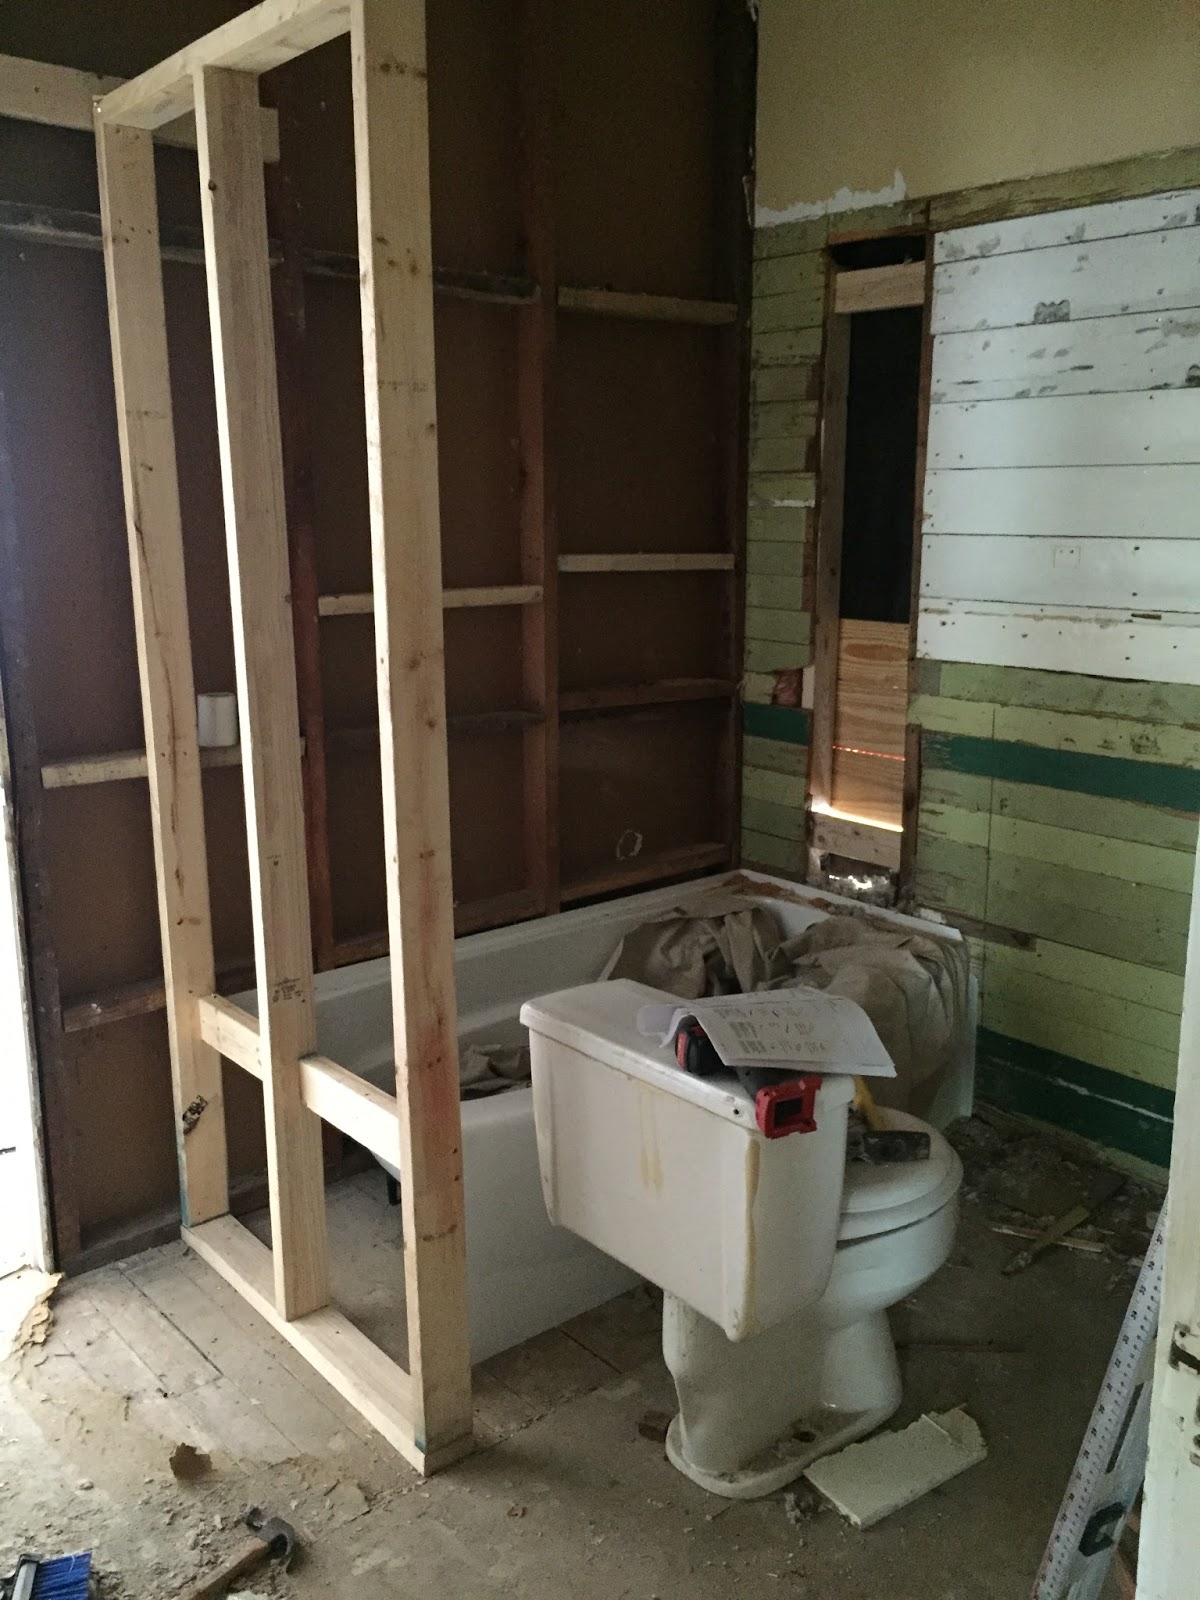
Casey framed up a small wall at the end of the tub to support the tub wall. A space was left in the exterior wall for the shower plumbing that needed to go back in. We bought a curved tub that was human-sized and tall enough for a normal person (compared to the previous tub) and considered a curved glass door. It was pricey so we went with a shower curtain rod. Maybe in the future we can upgrade. For now, it's perfect.  


Here's the finished closet with new shelving and textured walls. Cody and Casey did an excellent job. I think it's sufficent space for both our wardrobes. And if it's not, I clearly need to get rid of some of my clothes. I was really excited about the space at the top because I knew I would have big things I wanted to hide like suitcases and boxes. 


Here's some pictures of the wood ceiling with the wall paper ripped off. When I saw the kitchen ceiling I knew I wanted to keep the wood and just paint it white. It looked so cool. But as we inspected it a little more, we noticed massive holes where the attic dust would fall through. Certainly not something you want right over your food. So we had to think of an Plan B, which I think turned out way better than Plan A. 


The above picture is scary. I didn't know if we could pull this kitchen off at this point. There were about five layers of either paint or wall paper on the kitchen walls. And the top layer was thick, uneven texture that felt like sand paper. I couldn't wait to fix those walls. But before that we decided to take out the kitchen exterior door. It seemed like a door leading to nowhere. We didn't have a drive way on that side of the house so it just opened up right into our neighbors car. If you remember from the earlier pictures, there is also a little porch/stairs outside over the doorway , which was really cute, but impractical. I didn't like the thought of having so many ways into the house , as a safety issue alone. So we removed the door. And as I say 'we', I'm almost always using the royal 'we'. Casey and his family did all of the work. They reframed and re-insulated. 


Here's the new tub with walls. It was glued in place for a day before they removed the brace holding it up. Next for the bathroom is drywall, and...tile!


Comments

Popular posts from this blog

Life with a new smile!

So I'm finally finished with my clear aligners journey. One year later and I have a completely different smile and I still can't get over how much my teeth have changed. I'm so thankful for Dr. Morgan and all of his excellent staff that helped me through the entire process. It was SUCH a fun day at the office getting my last tray done and the buttons removed. Its pretty exciting when the whole office is invested in your journey and just as excited as you are to see the finished product. Check out an awesome video of my transformation at the bottom of this post! Here's my pre-aligner smile. I didn't think I had a particularly bad smile before my aligners, now I'm amazed at how bad they were. Here's how they look now!! Here's a really great video of my smile transformation. Thank you Aesthetic & Implant Dentistry for doing such a fantastic job on my smile. 😁    

The Paint'n Place.

During my recent trip to Bowling Green, KY I was fortunate enough to stop in on The Paint'n Place.  (<<check out their website) During my three years at WKU I spent almost all three working at this lovely pottery painting studio. It's one of a kind in BG and the staff here really became family to me when mine were so far away. It's such a cute happy studio with so many amazing pieces to paint. I was honored to see a lot of my samples still up on the shelves, and it brought back many fond memories. They do birthday parties, ladies nights, canvas painting parties, custom painted pieces, and new glass fusion! It's all seriously cool. My favorite thing about The Paint'n Place is the fact that everything you paint is so personal to you and makes something like a mug or a plate so special and unique. Of course I couldn't go in and not paint something, but I can't show you since its a gift for a special bride to be. Mrs. Linda Henry has put so muc

Deep Diamond Tufting.

I'm not sure why I wanted to make a tufted headboard. Maybe I saw one in a film or something but before too long I was combing through every tutorial or YouTube video I could find about it. That was a year ago. So this weekend I put my big girl panties on and summoned the courage to finally build my headboard. My favorite tutorials found  here , and here . Mine certainly won't be as good as theirs so I'll keep it brief. I think my total for all materials came to around $85 but then again my math is horrible so...  Make sure you take advantage of JoAnn's incredible sales. I think I saved $60 dollars when I went. I scored on my fabric too, only $9 a yard.  The most annoying part of this process, as all blogs stated, was the buttons. And I'd have to agree with them. They were so small. The fabric was so thick. The little tool that pushes the button together sucks so... with Mummy's help, my solution was pliers. Just use pliers. It will save your finger