
Drywall Makes Everything Look Better


Drywall was the turning point in every room of our house. The possibilities were just around the corner. I couldn't wait to start thinking about paint colors and tile options. The bathroom needed the most drywall, and then there were some patches in the kitchen to be fixed.
Mud texture was put on some of the walls because of cracks or huge lumps as the walls had moved over the years.


Here's the finished mud over the screws and patching the holes. This was a really exciting stage for me. It looked like a blank canvas ready to be painted at this point. But before I get too hasty, we needed knock-off texture applied to all the walls. We hired someone to do the texture and paint, mainly to save time. At this point, we were drastically approaching our wedding date. I wanted to be completely done with the house so I could move in before the wedding, and he could join me after we were married.


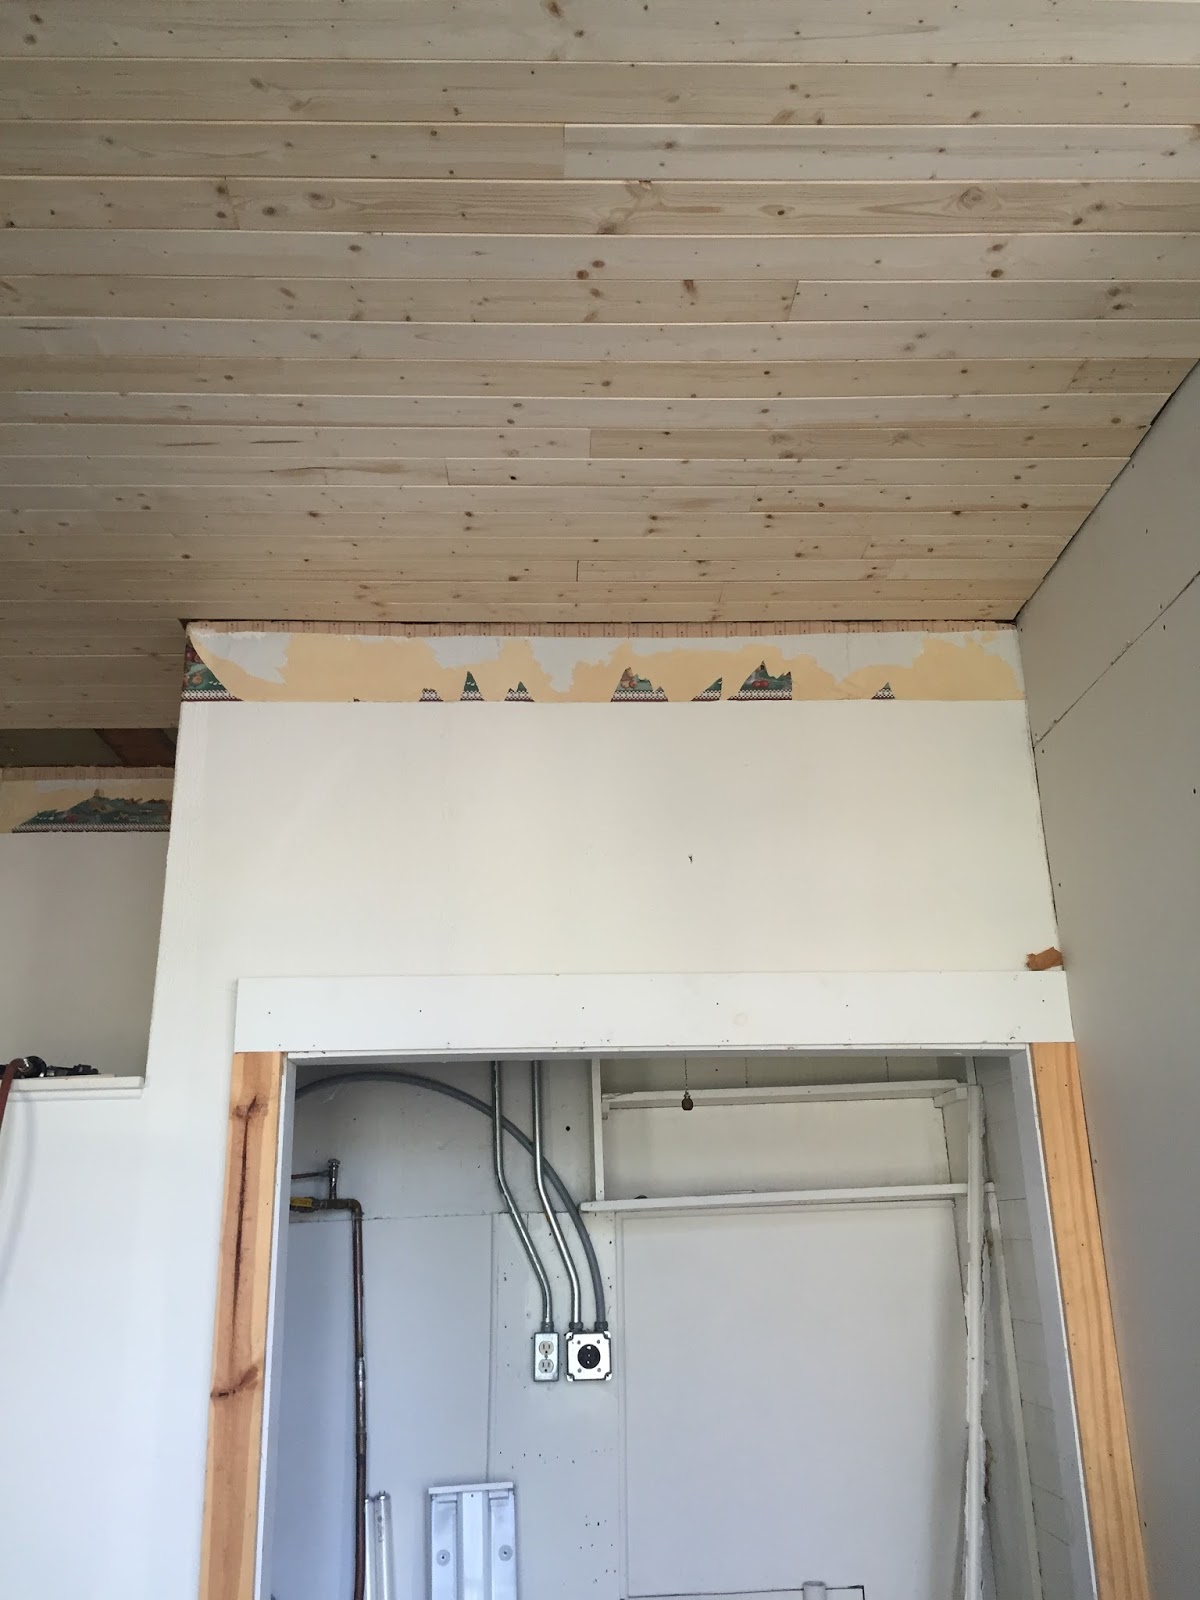
After peeling off the gross wall paper up on the kitchen ceiling we discovered wood paneling that had seen better days. Clearly the original ceiling. I loved it, but as I mentioned in my previous post there were too many holes letting dust in. We thought about options and we decided on new, thin wood paneling. We initially intended to paint it white, but after seeing how beautiful it looked in raw form, it was too nice to paint. Casey and Cody spent about a day installing the paneling and boy was it impressive. I took too many pictures, so I won't bore you, just a sampling.


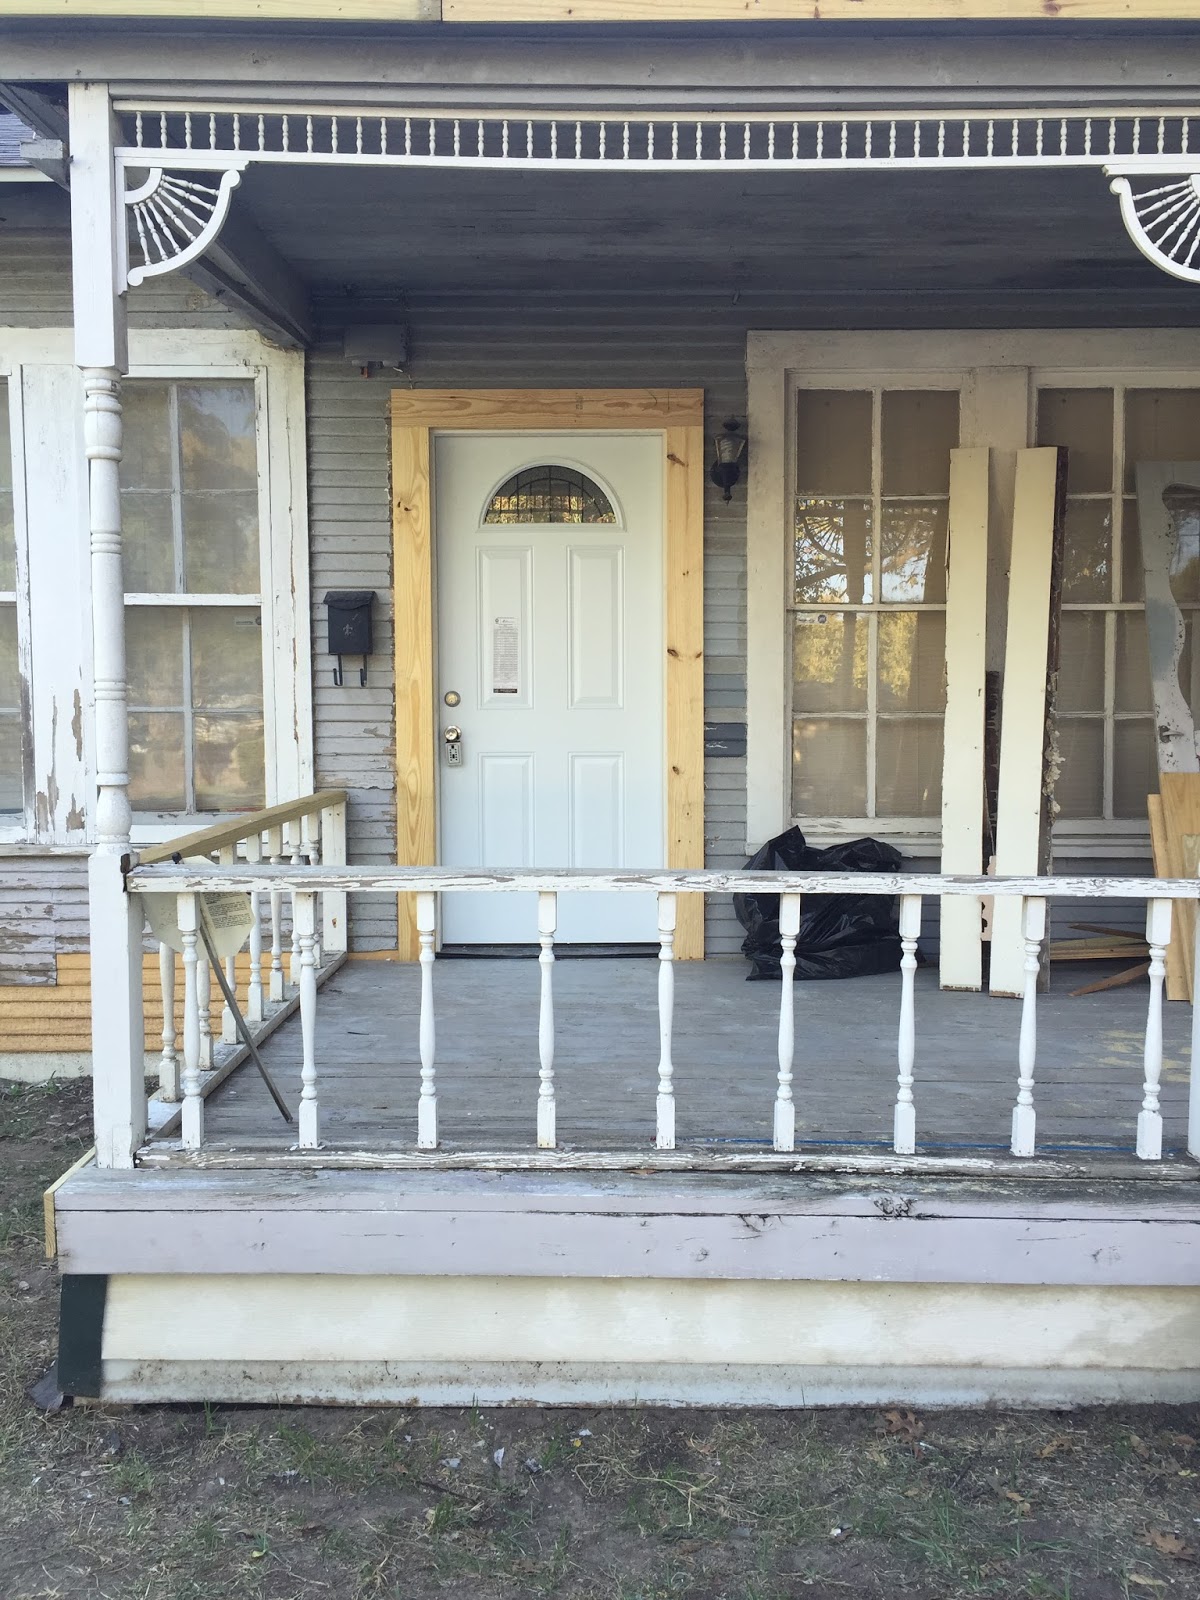
A little tension arose between Casey and I about the front door. 
See the old door here. It probably wasn't original, but it was beautiful solid wood. I had hopes of keeping it, maybe painting it. Casey had other hopes. And so enter new white door. It's not horrible, its just not the original. It got a new door frame and much needed dead bolt lock. 
I had gotten 99% say in fixing up this entire house (thanks Casey!) so he was due a little say.


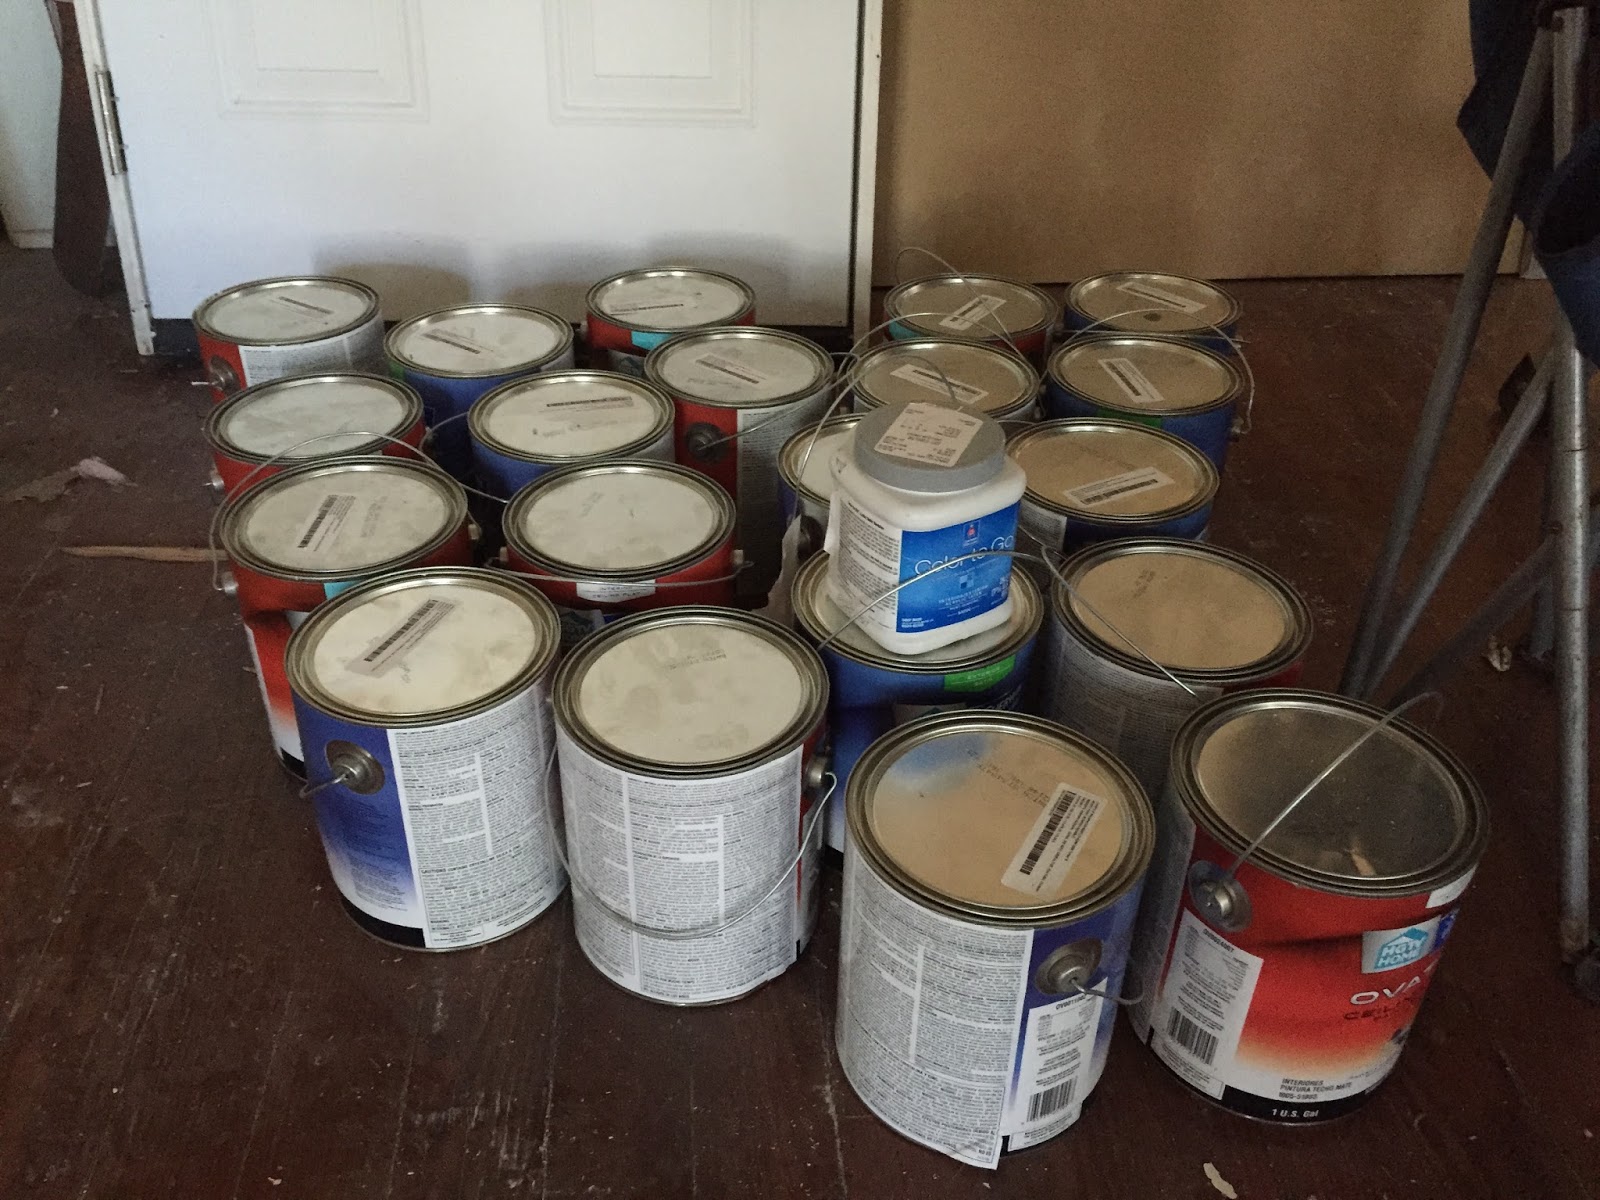
Here's a picture of the paint we bought for the interior and exterior. We came across a deal at Lowe's we couldn't pass up so bought a bunch of pre-mixed white paint to later mix up when we finally decided on a color. We, in this case, definitely meaning me. Paint colors are hard. I thought being an art teacher would help me in this case. Why wouldn't I be able to pick out a good color? 
Man, it was not easy.

More to come soon!


Comments

Popular posts from this blog

Life with a new smile!

So I'm finally finished with my clear aligners journey. One year later and I have a completely different smile and I still can't get over how much my teeth have changed. I'm so thankful for Dr. Morgan and all of his excellent staff that helped me through the entire process. It was SUCH a fun day at the office getting my last tray done and the buttons removed. Its pretty exciting when the whole office is invested in your journey and just as excited as you are to see the finished product. Check out an awesome video of my transformation at the bottom of this post! Here's my pre-aligner smile. I didn't think I had a particularly bad smile before my aligners, now I'm amazed at how bad they were. Here's how they look now!! Here's a really great video of my smile transformation. Thank you Aesthetic & Implant Dentistry for doing such a fantastic job on my smile. 😁    

The Paint'n Place.

During my recent trip to Bowling Green, KY I was fortunate enough to stop in on The Paint'n Place.  (<<check out their website) During my three years at WKU I spent almost all three working at this lovely pottery painting studio. It's one of a kind in BG and the staff here really became family to me when mine were so far away. It's such a cute happy studio with so many amazing pieces to paint. I was honored to see a lot of my samples still up on the shelves, and it brought back many fond memories. They do birthday parties, ladies nights, canvas painting parties, custom painted pieces, and new glass fusion! It's all seriously cool. My favorite thing about The Paint'n Place is the fact that everything you paint is so personal to you and makes something like a mug or a plate so special and unique. Of course I couldn't go in and not paint something, but I can't show you since its a gift for a special bride to be. Mrs. Linda Henry has put so muc

Deep Diamond Tufting.

I'm not sure why I wanted to make a tufted headboard. Maybe I saw one in a film or something but before too long I was combing through every tutorial or YouTube video I could find about it. That was a year ago. So this weekend I put my big girl panties on and summoned the courage to finally build my headboard. My favorite tutorials found  here , and here . Mine certainly won't be as good as theirs so I'll keep it brief. I think my total for all materials came to around $85 but then again my math is horrible so...  Make sure you take advantage of JoAnn's incredible sales. I think I saved $60 dollars when I went. I scored on my fabric too, only $9 a yard.  The most annoying part of this process, as all blogs stated, was the buttons. And I'd have to agree with them. They were so small. The fabric was so thick. The little tool that pushes the button together sucks so... with Mummy's help, my solution was pliers. Just use pliers. It will save your finger